

My culinary journey began, not in some fancy French kitchen, but in my grandma’s chaotic, flour-dusted haven. This Honey Pie Recipe, a family heirloom, is a testament to her baking prowess, a sweet symphony of textures and flavors. It’s more than just a pie; it’s a portal to a time of simpler joys. This recipe, passed down through generations, is my attempt to share a little slice of that happiness with you.
This Honey Pie Recipe is ridiculously easy to make, even for a kitchen klutz like me. Prepare yourself for a taste explosion that will transport you straight to grandma’s kitchen, guaranteed. It’s perfect for any occasion, from a casual weeknight dinner to a special celebration.
This Honey Pie Recipe offers:
A wonderfully easy preparation process that even baking novices can master.
An explosion of sweet and subtly savory flavors that will tantalize your taste buds.
A visually stunning pie that’s sure to impress your guests, whether it’s a weeknight dinner or a special gathering.
A versatile dessert that you can easily adapt to your preferences, adding your favorite fruits or spices.
Ingredients for Honey Pie Recipe
Here’s what you’ll need to make this delicious dish:
The full ingredients list, including measurements, is provided in the recipe card directly below.
How to Make Honey Pie Recipe
Follow these simple steps to prepare this delicious dish:
Step 1: Making the Crust
In a large bowl, whisk together 2 1/2 cups all-purpose flour and 1 teaspoon salt. Cut in 1 cup cold unsalted butter using a pastry blender or your fingers until the mixture resembles coarse crumbs. Gradually add 6-8 tablespoons of ice water, mixing until the dough just comes together. Wrap the dough in plastic wrap and chill for at least 30 minutes.
Step 2: Preparing the Filling
In a medium saucepan, combine 1 cup honey, 1/2 cup brown sugar, 1 teaspoon cinnamon, 1/4 teaspoon nutmeg, 2 tablespoons lemon juice, and a pinch of salt. Whisk in 2 tablespoons of agar-agar powder. Bring to a simmer over medium heat, stirring constantly, until the agar-agar is fully dissolved and the mixture thickens slightly.
Step 3: Assembling the Pie
Preheat your oven to 375°F (190°C). On a lightly floured surface, roll out half of the chilled dough into a 12-inch circle. Carefully transfer it to a 9-inch pie plate. Pour the honey filling into the crust. Roll out the remaining dough and either place it over the filling or cut it into strips for a lattice top. Crimp the edges to seal.
Step 4: Baking the Pie
Brush the top crust with milk or plant-based milk alternative. Bake for 45-50 minutes, or until the crust is golden brown and the filling is set. Let cool completely on a wire rack before serving.
Step 5: Serving the Pie
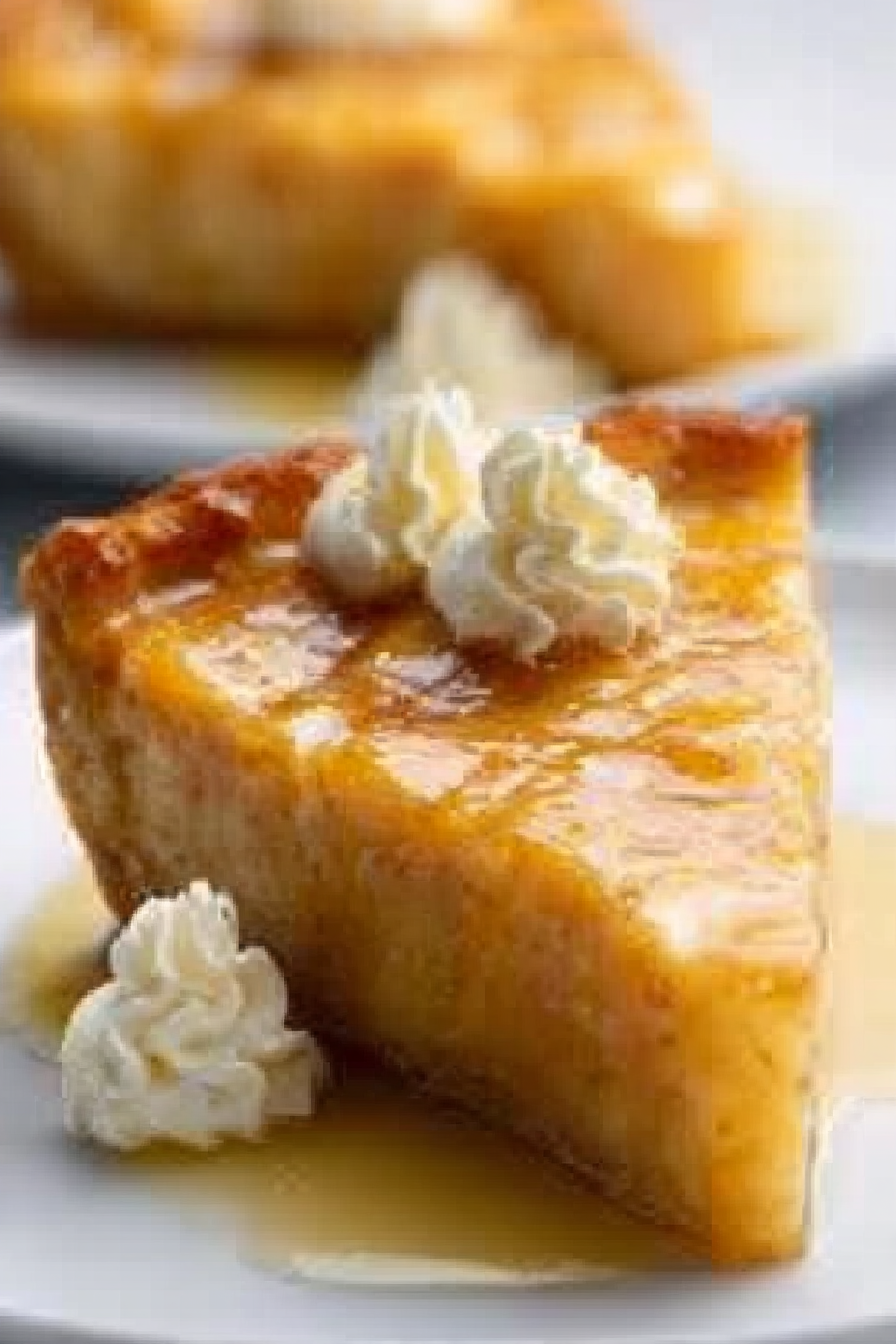
Once cooled, slice and serve your Honey Pie. A scoop of vanilla ice cream or a dollop of whipped cream elevates this already amazing dessert to another level.
Step 6: Enjoying the Pie
This Honey Pie Recipe is best enjoyed with loved ones, sharing stories and laughter around a table filled with warmth and deliciousness. The sweet taste is matched only by the sweet memories it evokes. Enjoy!
Perfecting the Cooking Process

First, prepare the Honey Pie filling by combining all ingredients. Then, blind bake the pie crust for optimal crispness. Finally, pour in the cooled filling and bake until golden brown and set. This order ensures a perfectly cooked, delicious Honey Pie.
Add Your Touch
Feel free to experiment! Swap out the apples for pears or berries. Add a sprinkle of cinnamon or nutmeg for a warm spice kick. A dollop of whipped coconut cream adds a lovely touch after baking.
Storing & Reheating
Store leftover Honey Pie, covered, in the refrigerator for up to three days. Reheat gently in the microwave or oven until warmed through. Avoid over-heating, which can make the crust soggy.
Use high-quality honey for a richer flavor.
Don’t overfill the pie crust; it can cause leaks during baking.
Let the filling cool completely before adding it to the crust for even baking.
My grandma’s Honey Pie was legendary. Her secret? A pinch of salt to enhance the sweetness.
The Heavenly Honey Pie Recipe
: A Sweet Story
This Honey Pie recipe isn’t just about baking; it’s about conjuring up memories, sharing joy, and creating something truly special. It’s a recipe steeped in tradition, a touch of nostalgia, and a whole lot of deliciousness. Let’s embark on this culinary adventure together, shall we?
A Symphony of Flavors
: The Filling
This Honey Pie recipe is all about simplicity and allowing the natural flavors to shine. We’ll start with a beautiful blend of sweet and tart, featuring crisp apples, bursting with juicy goodness. Imagine sinking your teeth into a slice, and the sweet honey coating your tongue. The tang of lemon adds a delightful counterpoint, preventing any cloying sweetness. We’re also going to add a touch of warmth with a whisper of cinnamon, creating a symphony of flavors that dance on your palate. No need for fancy schmancy ingredients here – just the finest, freshest produce nature has to offer.
The Magic Ingredients for the Filling
:
1 cup honey (the better the honey, the better the pie!)
1/4 cup lemon juice (freshly squeezed, for that extra zing!)
1 teaspoon ground cinnamon (a touch of warmth, never overpowering)
1/4 teaspoon ground nutmeg (optional, adds a lovely complexity)
4 medium apples (Granny Smith or Honeycrisp work perfectly, peeled, cored, and sliced)
2 tablespoons cornstarch (to thicken the luscious filling)
1/4 cup water (to create a smooth slurry with the cornstarch)
Preparing the Divine Filling
:
In a large bowl, gently toss the sliced apples with the lemon juice to prevent browning. This is where the magic begins. In a separate bowl, whisk together the honey, cinnamon, nutmeg (if using), cornstarch, and water until smooth. This is your luscious, thickening agent. Now, pour the honey mixture over the apples and gently stir to coat evenly. The apples are now ready to embrace the oven’s warm embrace.
The Crust
: A Golden, Buttery Embrace
Let’s talk about the foundation – the pie crust. A perfectly flaky, golden crust is essential for any Honey Pie worth its salt. You can use a store-bought crust if time is of the essence, but making your own adds a rewarding personal touch. Believe me, the effort is well worth it. The aroma alone will transport you to a cozy kitchen filled with the promise of deliciousness.
Creating the Perfect Crust
:
1 1/4 cups all-purpose flour
1/2 teaspoon salt
1/2 cup cold unsalted butter, cut into small cubes
1/4 cup ice water
Putting it all Together
:
In a large bowl, combine flour and salt. Cut in the cold butter using a pastry blender or your fingers until the mixture resembles coarse crumbs. Gradually add ice water, mixing until the dough just comes together. Don’t overmix. Wrap the dough in plastic wrap and chill for at least 30 minutes. This resting period allows the gluten to relax, resulting in a more tender crust. On a lightly floured surface, roll out the dough into a 12-inch circle and transfer it to a 9-inch pie plate. Trim and crimp the edges.
The Baking Process
: Patience is a Virtue (and Delicious)
This is where the magic happens. Remember, patience is key. We’re aiming for a perfectly golden, crisp crust and a luscious, set filling.
Baking Instructions
:
Preheat your oven to 375°F (190°C). Blind bake the pie crust for 15 minutes by lining it with parchment paper and filling it with pie weights or dried beans. This prevents a soggy bottom – a common pie-baking pitfall. Remove the weights and parchment paper and bake for another 5 minutes, until lightly golden. Pour the cooled Honey Pie filling into the pre-baked crust. Bake for 40-45 minutes, or until the filling is set and the crust is deeply golden brown. Let it cool completely before slicing and serving. And there you have it – a slice of heaven!
Honey Pie Recipe
: Frequently Asked Questions
Q: Can I use other fruits besides apples?
A: Absolutely! Pears, berries, or even a mix of fruits would work beautifully.
Q: How can I make the crust more flaky?
A: Keep the butter very cold and don’t overwork the dough.
Q: How do I know when the pie is done?
A: The filling should be set and the crust should be golden brown.
Q: Can I make this pie ahead of time?
A: Yes, but let it cool completely before storing in the refrigerator.
This Honey Pie recipe is more than just a dessert; it’s a story. A story of shared moments, family gatherings, and the simple pleasure of creating something delicious from scratch. So go ahead, gather your ingredients, and let the baking begin! You’ll be amazed at how easily you can create this sweet masterpiece. Enjoy every bite!
Conclusion for Honey Pie Recipe
This Honey Pie Recipe offers a delightful balance of sweet and subtly tart flavors. The process, while requiring some time and care, is incredibly rewarding. The result is a pie that’s both beautiful and delicious, perfect for any occasion. Remember to adjust sweetness to your preference and experiment with different types of honey for unique flavor profiles. With its simple yet satisfying nature, this Honey Pie Recipe is sure to become a family favorite. Enjoy!
Print
Honey Pie Recipe
Delicious honey pie recipe recipe with detailed instructions and nutritional information.
- Total Time: 35 minutes
- Yield: 4 servings 1x
Ingredients
- 1 1/4 cups graham cracker crumbs
- 1/4 cup granulated sugar
- 6 tablespoons (3 ounces) unsalted butter, melted
- 1 (14 ounce) can sweetened condensed milk
- 1/2 cup honey
- 1/4 cup lemon juice
- 1 teaspoon vanilla extract
- 1/2 cup chopped pecans (optional)
Instructions
- Step 1: Preheat oven to 350°F (175°C). In a medium bowl, combine graham cracker crumbs, sugar, and melted butter. Mix well until evenly moistened.
- Step 2: Press the crumb mixture firmly into the bottom of a 9-inch pie plate. Bake for 8-10 minutes, or until lightly golden. Remove from oven and let cool completely.
- Step 3: While the crust is cooling, in a separate bowl, whisk together sweetened condensed milk, honey, lemon juice, and vanilla extract until smooth. Stir in pecans, if using.
- Step 4: Pour the honey filling over the cooled crust.
- Step 5: Refrigerate for at least 4 hours, or preferably overnight, to allow the filling to set completely.
- Step 6: Serve chilled and enjoy!
Notes
- Store leftover pie in the refrigerator for up to 3 days, covered tightly with plastic wrap to prevent it from drying out.
- For a warm, gooey treat, gently reheat individual slices in the microwave for 15-20 seconds, or until heated through.
- Serve a slice of Honey Pie with a scoop of vanilla ice cream or a dollop of whipped cream for an extra touch of sweetness and indulgence.
- To ensure a perfectly smooth filling, make sure the condensed milk is well-whisked before adding the honey and other ingredients, preventing any lumps.
- Prep Time: 15 minutes
- Cook Time: 20 minutes
- Method: Stovetop
- Cuisine: American
FAQs
Can I make this Honey Pie Recipe ahead of time?
Absolutely! In fact, making this Honey Pie Recipe a day or two in advance allows the flavors to meld beautifully. The crust will soften slightly, but that adds to its rustic charm. Just store it, well-wrapped, in the refrigerator. Bring it to room temperature about 30 minutes before serving for optimal enjoyment. You’ll be amazed at how much better it tastes the next day, a testament to the magic of time and honey.
What kind of honey is best for this Honey Pie Recipe?
While you can use any honey you like, a darker honey, like buckwheat or wildflower, will give a richer, more complex flavor to your Honey Pie Recipe. Lighter honeys, such as clover honey, will provide a milder, sweeter taste. Experiment to find your favorite! The honey is the star of this show, after all, so choose wisely and let your taste buds be your guide.
Is it possible to adapt this Honey Pie Recipe for a gluten-free diet?
Yes, adapting this Honey Pie Recipe for a gluten-free diet is quite straightforward! Simply substitute your favorite gluten-free pie crust recipe for the traditional one. Many excellent gluten-free pie crust options are available in stores or online, making it easy to create a delicious and allergy-friendly Honey Pie Recipe. Remember to check the ingredients to ensure they meet your dietary needs.
How do I prevent the Honey Pie Recipe from becoming soggy?
The key to preventing sogginess lies in the crust and the filling. Ensure your crust is properly baked before adding the filling, and that the filling itself isn’t too watery. If you’re using a fruit filling, be sure to drain any excess juice. A well-baked crust will offer superior protection against moisture, keeping your Honey Pie Recipe delightfully crisp. This is essential to achieving the perfect balance of textures.


Leave a Comment