

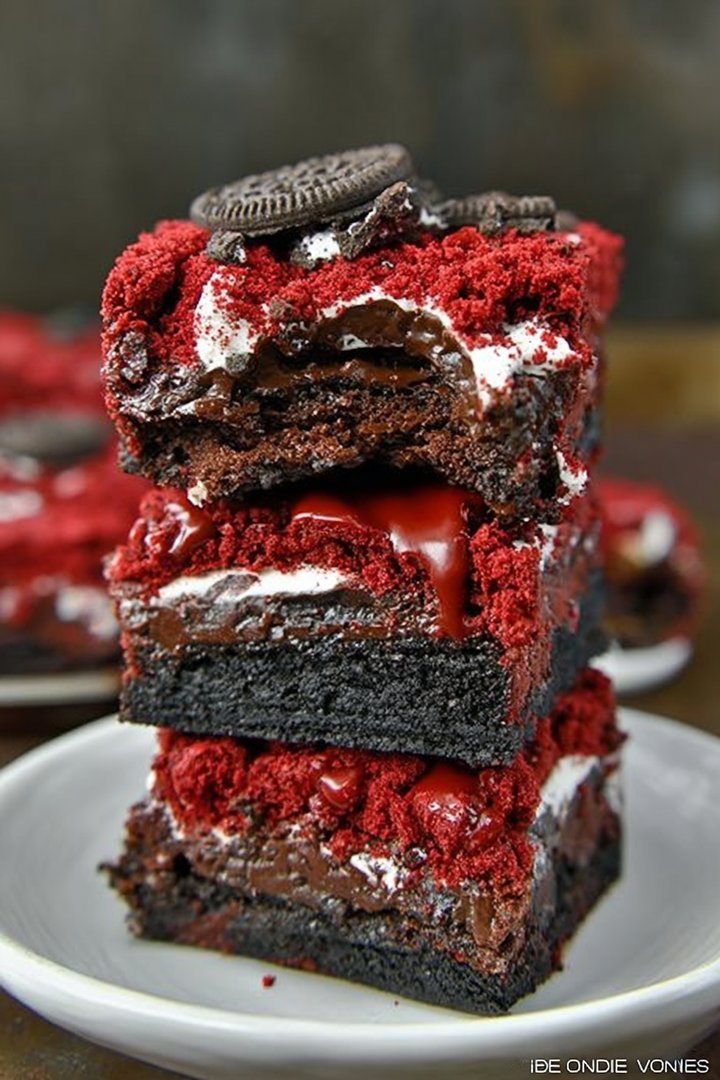
Imagine biting into a warm, fudgy brownie, the red velvet whispering sweet nothings while a hidden Oreo surprise crunches and melts in your mouth. It’s like a party in your mouth, and everyone’s invited!
These Oreo Stuffed Red Velvet Brownies are not just a dessert; they’re an experience, a comforting hug, and a delightful twist all baked into one glorious treat, promising layers of textures and tastes that will leave you craving more.
- Effortlessly combines the richness of red velvet brownies with the delightful crunch of Oreo cookies.
- The contrasting flavors create a symphony of sweetness with the slight tanginess of red velvet.
- Visually stunning with its vibrant red hue and contrasting white Oreo filling, perfect for presentation.
- Versatile treat ideal for parties, holidays, or simply satisfying your sweet tooth on any given day.
Ingredients for Oreo Stuffed Red Velvet Brownies
Here’s what you’ll need to make this delicious dish:
The full ingredients list, including measurements, is provided in the recipe card directly below.
How to Make Oreo Stuffed Red Velvet Brownies
Follow these simple steps to prepare this delicious dish:
Step 1: Preheat and Prep
Preheat your oven to 350°F (175°C). Grease and flour a 9×13 inch baking pan. This prevents sticking and ensures easy removal of the brownies later.
Step 2: Dry Ingredients Unite
In a medium bowl, whisk together the flour, cocoa powder, baking soda, and salt. This ensures even distribution of these key elements, leading to a consistent texture and flavor throughout the final product.
Step 3: Wet Ingredients Tango
In a large bowl, combine the sugar, oil, eggs, and Alcohol-free alcohol-free vanilla extract. Beat until smooth. Next, stir in the red food coloring and white vinegar. Then, alternate adding the dry ingredients and buttermilk, beginning and ending with the dry ingredients. Mix until just combined. Avoid overmixing to keep the brownies tender.
Step 4: Oreo Embedding Ceremony
Pour half of the batter into the prepared pan. Arrange the Oreo cookies in a single layer over the batter. Gently pour the remaining batter over the Oreos, spreading evenly.
Step 5: Bake to Perfection
Bake for 25-30 minutes, or until a toothpick inserted into the center comes out with moist crumbs attached. Be careful not to overbake, or the brownies will become dry.
Step 6: Cool and Devour
Let the brownies cool completely in the pan before cutting into squares. This prevents them from crumbling and allows the flavors to meld together beautifully. Serve and enjoy your Oreo Stuffed Red Velvet Brownies!
Perfecting the Cooking Process
To guarantee brownie bliss, melt the butter and sugar first, then gently fold in the dry ingredients to avoid overmixing. Arrange those beloved Oreo cookies strategically for even distribution. Bake until a toothpick comes out with fudgy crumbs, not clean!
Add Your Touch
Feeling adventurous? Swap Alcohol-free alcohol-free vanilla extract for almond or peppermint. Stir in white chocolate chips for extra sweetness, or chopped walnuts for a textural contrast. Add a cream cheese swirl on top before baking for an even more decadent delight.
Storing & Reheating
Store leftover Oreo Stuffed Red Velvet Brownies in an airtight container at room temperature for up to three days, or in the refrigerator for up to a week. To reheat, microwave for 15-20 seconds or enjoy them cold!
- Don’t overmix the batter! Overmixing develops gluten, leading to tough brownies. Gently fold ingredients until just combined.
- Use room temperature ingredients for a smoother batter. This helps everything blend evenly and prevents lumps.
- Let the brownies cool completely before cutting. This prevents them from crumbling and makes for cleaner slices.
(Personal anecdote formated as paragraph subheading)
I remember making these for a friend’s birthday party. Everyone raved about them, especially the hidden Oreo surprise inside! It was definitely a brownie-baking triumph.
Let’s dive into the wonderful world of **Oreo Stuffed Red Velvet Brownies**. These aren’t your average brownies; they’re a delightful explosion of flavor and texture, a culinary triple threat that’ll knock your socks off. We’re talking rich, velvety red velvet, a fudgy brownie base, and a creamy Oreo center. Prepare to be amazed!
Why These Oreo Stuffed Red Velvet Brownies Are the Bomb
These brownies are more than just dessert; they’re an experience. Imagine sinking your teeth into a moist, chewy brownie with a hint of cocoa, followed by the sweet, creamy crunch of an Oreo. It’s like a party in your mouth, and everyone’s invited! The contrast of textures and flavors is simply divine.
And let’s be honest, who doesn’t love a good surprise? The hidden Oreo center adds an element of fun and excitement. It’s like a treasure hunt with every bite. Plus, they look absolutely stunning, making them perfect for parties, potlucks, or simply treating yourself after a long day. I mean, who could resist a stack of these beauties?
Gather Your Red Velvet Brownie Arsenal (Ingredients List)
Alright, let’s get down to business. To create these little masterpieces, you’ll need:
- 1 box (15.25 ounces) red velvet cake mix: This is our shortcut to red velvet goodness.
- 1/2 cup vegetable oil: For moisture and that perfect brownie chew.
- 1/4 cup water: Just enough to bring the batter together.
- 2 large eggs: Binding agents and richness providers.
- 1 teaspoon Alcohol-free alcohol-free vanilla extract: Enhances the red velvet flavor.
- 1 package (about 30) Oreo cookies: The star of the show!
- 1/2 cup all-purpose flour: For extra fudginess and structure.
- 1/4 cup unsweetened cocoa powder: To deepen the chocolate flavor.
- 1/2 cup melted butter, unsalted: Adds richness and helps the brownies bake evenly.
- 1 cup granulated sugar: Sweetness is key!
- Pinch of salt: Enhances the other flavors.
See? Nothing too complicated. Most of these ingredients are probably already hanging out in your pantry. If not, a quick trip to the store, and you’re ready to rock and roll!
Step-by-Step: How to Make Oreo Stuffed Red Velvet Brownies
Okay, time to transform these ingredients into glorious **Oreo Stuffed Red Velvet Brownies**. Don’t worry; I’ll guide you through every step of the way.
Step 1: Prep Work is Key
Preheat your oven to 350°F (175°C). Grease and flour a 9×13 inch baking pan. This ensures your brownies won’t stick and will come out cleanly. Nobody wants a brownie casualty!
Step 2: Red Velvet Magic
In a large bowl, combine the red velvet cake mix, vegetable oil, water, eggs, and Alcohol-free alcohol-free vanilla extract. Mix until just combined. Don’t overmix! Overmixing leads to tough brownies. We want fudgy, not rubbery.
Step 3: Brownie Batter Boost
In a separate bowl, whisk together the flour, cocoa powder, sugar, and salt. Add the melted butter and mix until well combined. This is the base of our fudgy brownie goodness.
Step 4: Marrying the Flavors
Gently fold the brownie batter into the red velvet batter until just combined. Again, resist the urge to overmix! We’re aiming for a beautiful swirl of red velvet and chocolate.
Step 5: Oreo Placement Perfection
Pour half of the batter into the prepared baking pan. Arrange the Oreo cookies in a single layer over the batter. Make sure each brownie gets its fair share of Oreo goodness.
Step 6: Layering Love
Pour the remaining batter over the Oreo cookies, spreading it evenly. This seals the Oreos in their fudgy red velvet cocoon.
Step 7: Bake ‘Til Perfection
Bake for 25-30 minutes, or until a toothpick inserted into the center comes out with fudgy crumbs. Be careful not to overbake! Overbaked brownies are sad brownies.
Step 8: Cool Down and Enjoy
Let the brownies cool completely in the pan before cutting into squares. This is crucial! If you cut them while they’re still warm, they’ll be a gooey mess. Patience is a virtue, my friend. Once cooled, cut, serve, and prepare for brownie bliss!
Troubleshooting Your Oreo Stuffed Red Velvet Brownies
Even the best bakers sometimes face challenges. Here are a few common issues and how to fix them:
- **Brownies are too dry:** You might have overbaked them. Reduce the baking time next time, or add a tablespoon or two of milk to the batter.
- **Brownies are too gooey:** They might not be fully cooked. Bake them for a few more minutes, checking frequently with a toothpick.
- **Oreos are sinking to the bottom:** The batter might be too thin. Add a tablespoon or two of flour to thicken it up.
- **Brownies are not red enough:** Use a high-quality red velvet cake mix, or add a few drops of red food coloring to the batter.
Remember, baking is a science, but it’s also an art. Don’t be afraid to experiment and adjust the recipe to your liking.
Variations on a Theme: Elevate Your Brownie Game
Want to take these **Oreo Stuffed Red Velvet Brownies** to the next level? Here are a few ideas:
- **Cream Cheese Swirl:** Swirl cream cheese frosting into the batter before baking for an extra layer of decadence.
- **White Chocolate Chips:** Add white chocolate chips to the batter for a delightful contrast of flavors.
- **Nuts:** Sprinkle chopped walnuts or pecans over the batter before baking for added crunch.
- **Peanut Butter:** Add a layer of peanut butter between the batter and the Oreos for a Reese’s-inspired treat.
- **Different Oreo Flavors:** Experiment with different Oreo flavors, such as Golden Oreos or Mint Oreos.
The possibilities are endless! Let your creativity shine and create your own signature version of these amazing brownies.
Serving Suggestions: Because Presentation Matters
These brownies are delicious on their own, but a few simple additions can elevate them to gourmet status.
- **Ice Cream:** Serve them warm with a scoop of vanilla ice cream for a classic combination.
- **Whipped Cream:** Top them with whipped cream and a sprinkle of cocoa powder for a touch of elegance.
- **Berries:** Garnish them with fresh raspberries or strawberries for a pop of color and flavor.
- **Chocolate Sauce:** Drizzle them with chocolate sauce for an extra dose of chocolatey goodness.
- **Coffee:** Pair them with a cup of hot coffee or tea for the perfect afternoon treat.
No matter how you choose to serve them, these brownies are sure to be a hit.
The Final Verdict: Oreo Stuffed Red Velvet Brownie Bliss
So there you have it: a complete guide to making the most delicious **Oreo Stuffed Red Velvet Brownies** you’ve ever tasted. They’re easy to make, incredibly flavorful, and guaranteed to put a smile on your face. So go ahead, give them a try, and prepare to be amazed!
Remember, baking is all about having fun. Don’t be afraid to make mistakes, experiment with flavors, and most importantly, enjoy the process. Happy baking!
Conclusion for Oreo Stuffed Red Velvet Brownies :
In conclusion, Oreo Stuffed Red Velvet Brownies are a guaranteed crowd-pleaser, blending the best of two worlds into one delectable dessert. The slight tang of the red velvet, the fudgy texture, and the creamy, crunchy Oreo center create a symphony of flavors and textures that are simply irresistible. Easy to customize and perfect for any occasion, these brownies are sure to become a family favorite. So, go ahead, bake a batch and prepare to be amazed by the happy faces around you.
Print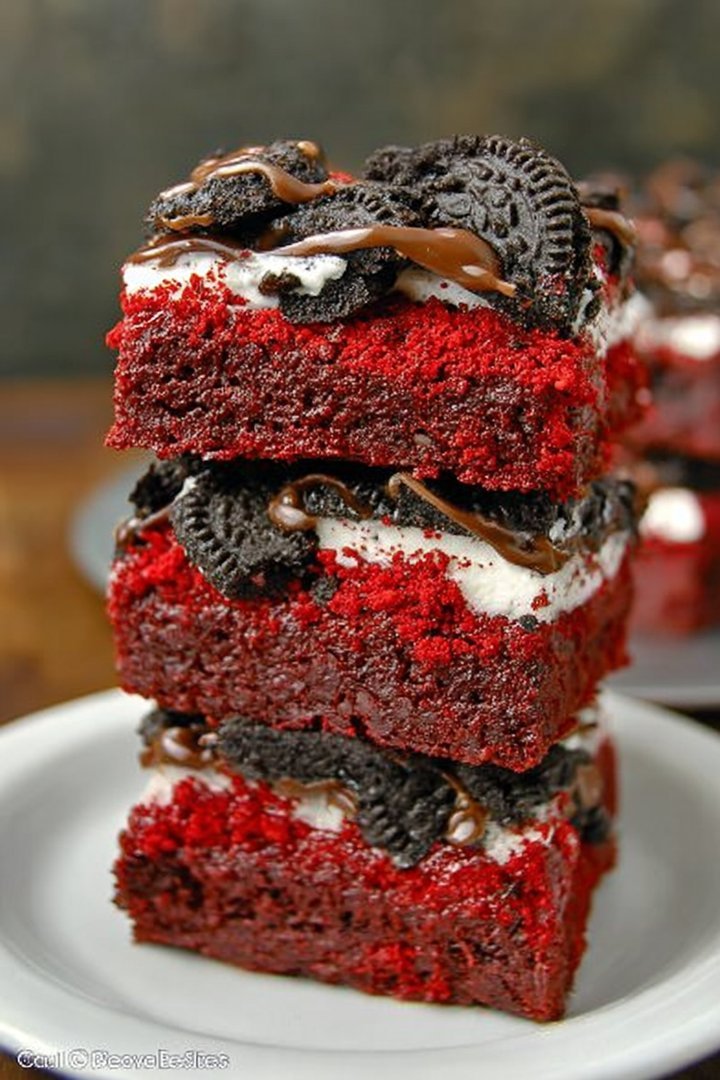
Oreo Stuffed Red Velvet Brownies
Delicious oreo stuffed red velvet brownies recipe with detailed instructions and nutritional information.
- Total Time: 35 minutes
- Yield: 4 servings
Ingredients
- All-purpose flour: 1 cup
- Unsweetened cocoa powder: 1/2 cup
- Granulated sugar: 1 cup
- Brown sugar: 1/2 cup
- Unsalted butter, melted: 1/2 cup (1 stick)
- Eggs: 2 large
- Red food coloring: 2 tablespoons
- Oreo cookies: 15-20
Instructions
- Step 1: Preheat oven to 350°F (175°C). Grease and lightly flour an 8×8 inch baking pan.
- Step 2: In a large bowl, whisk together the melted butter, granulated sugar, and brown sugar until well combined. Beat in the eggs one at a time, then stir in the red food coloring.
- Step 3: In a separate bowl, whisk together the flour and cocoa powder. Gradually add the dry ingredients to the wet ingredients, mixing until just combined. Do not overmix.
- Step 4: Pour half of the brownie batter into the prepared baking pan. Arrange the Oreo cookies in a single layer over the batter.
- Step 5: Carefully spread the remaining brownie batter over the Oreo cookies, ensuring they are completely covered.
- Step 6: Bake for 25-30 minutes, or until a toothpick inserted into the center (away from the Oreos) comes out with moist crumbs. Let cool completely before cutting into squares.
Notes
- Store leftover brownies in an airtight container at room temperature for up to 3 days to keep them soft.
- For a warm, gooey treat, microwave a brownie square for 10-15 seconds.
- Serve these decadent brownies with a scoop of vanilla ice cream or a dusting of powdered sugar for extra indulgence.
- To prevent a dry brownie, avoid overbaking and gently fold the dry ingredients into the wet until just combined – a few streaks of flour are okay!
- Prep Time: 15 minutes
- Cook Time: 20 minutes
- Method: Stovetop
- Cuisine: American
FAQs :
Can I use a different type of cookie in these Oreo Stuffed Red Velvet Brownies?
Absolutely! While the classic Oreo provides a delightful creamy crunch, feel free to experiment. Consider using chocolate chip cookies for a double dose of chocolate, or perhaps peanut butter cookies for a salty-sweet twist. Golden Oreos could add a different textural element to your dessert. The possibilities are truly endless; let your taste buds guide you! Just ensure the cookie you choose is relatively flat to maintain the brownie’s even baking and stability. Have fun customizing these red velvet brownies to your personal preferences.
How do I prevent my Oreo Stuffed Red Velvet Brownies from being dry?
The key to moist red velvet brownies lies in careful baking. Avoid overbaking at all costs! Begin checking for doneness a few minutes before the recommended time. The edges should be set, but the center should still have a slight jiggle. A toothpick inserted into the center might come out with a few moist crumbs clinging to it. Also, ensure accurate measurements of your ingredients, particularly the liquid ones. Don’t pack the flour when measuring; gently spoon it into the measuring cup and level it off. These steps will ensure a fudgy, decadent brownie experience.
What’s the secret to getting that vibrant red color in my Red Velvet Brownies?
The red color comes from food coloring, but be cautious! Liquid food coloring can sometimes alter the batter’s consistency. Gel food coloring is the ideal choice because it delivers intense color without adding excess liquid. Begin with a small amount and gradually add more until you achieve your desired hue. Remember, the color will deepen slightly as the brownies bake. If you’re concerned about using artificial food coloring, explore natural alternatives like beet juice powder, but be mindful that it may subtly alter the flavor.
Can I freeze Oreo Stuffed Red Velvet Brownies?
Definitely! These brownies freeze remarkably well. Allow them to cool completely after baking. Then, cut them into individual squares. Wrap each brownie tightly in plastic wrap, followed by a layer of aluminum foil, or place them in an airtight container. They can be stored in the freezer for up to 2-3 months. When you’re ready to enjoy one, simply thaw it at room temperature for about 30 minutes, or pop it in the microwave for a few seconds for a warm, gooey treat. Freezing is a great way to have these indulgent red velvet brownies ready whenever a craving strikes.


Leave a Comment